

Installing Terrazzo – General Installation Procedures
Bringing durability, design, and low maintenance together, terrazzo is a one-of-a-kind building material used in many applications today. However, installing terrazzo is no walk in the park. Professional installation is recommended when adding terrazzo to any residential or commercial construction project. As a professional terrazzo installer in the Southern United States, Doyle Dickerson Terrazzo provides a general installation guide to help our audience understand each step behind the process.
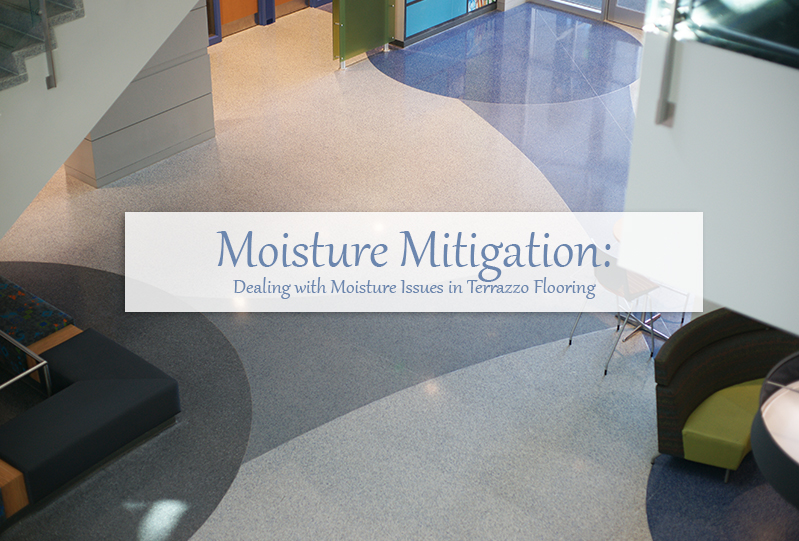
Moisture Testing
Epoxy resins were introduced to the U.S. market in the 1970s, becoming an attractive option for installers. As an alternative to traditional cement terrazzo systems, epoxy terrazzo offered several advantages. Not only does epoxy terrazzo showcase more color selections, but installers also recognize epoxy terrazzo for its thin-set form at 3/8″ and 1/4″ thickness. higher compressive and tensile strengths, and lighter weight. And installing epoxy terrazzo had a faster cure time above all.
Most importantly installers must concentrate on preparing the substrate prior to the pouring of terrazzo. Installers should conduct a moisture vapor transmission test on all slabs receiving epoxy terrazzo. This is to make sure that each slab is in accordance with readings of 3 pounds per 1,000 square feet per 24 hours. The recommended test is the ASTM-F-2170 probe test. The threshold is commonly 75% to 80% relative humidity. An ASTM-F-1960 Anhydrous Calcium Chloride test is acceptable in circumstances where the ASTM-F-2170 probe test cannot be performed.
Once the moisture levels are acceptable, installers can continue to other areas of the concrete preparation stage.

Concrete Preparation
Before pouring the terrazzo, an installer needs to check the concrete for proper level tolerance. Once the concrete is compliant, installers can open up the concrete for adhesion by shot blasting or grinding the surface.
Next, installers vacuum clean the concrete floor and depending on the nature of the concrete floor, an installer will do the following actions: 1) Apply a moisture mitigation barrier if needed based off probe readings. 2) Inspect the floor for cracks and apply a flexible membrane to prevent the formation of substrate cracks during the terrazzo floor’s lifecycle. 3) Installers will ensure the surface is at level tolerance and apply a fill epoxy to create a uniformly even surface.
Floor Layout
A great aspect of a terrazzo floor its flexible design. Installers have the ability to install complex patterns, school emblems and logos, and directional guides with epoxy terrazzo.
To develop a floor layout, installers will place divider strips across the floor, including saw cuts and expansion areas. These divider strips are fastened in place. When placing divider strips to create a floor layout, the thing to remember is that these divider strips help to control expansion joints but also indicate color transitions in a terrazzo floor. Some terrazzo projects consist of the use of over twenty epoxy resin colors; therefore, divider strips are a key part of the installation.
Aluminum, zinc, and brass are common types of metals used for divider strips.

Installing Epoxy Terrazzo
Now for the fun part.
With the concrete preparation and floor layout stages out of the way, an installer can begin mixing together the ingredients that will make up the terrazzo floor. Epoxy terrazzo comes in a 5:1 ratio, meaning an installer will combine a part A epoxy resin (1 5-gallon bucket specified) with a part B hardener (1 1-gallon can) and mix thoroughly inside a mixer.
Fill power and specified aggregates are added to the mix.
It is best to have skilled professionals who can mix together these components. Epoxy resins harden fast and can create quite the clean up for first-time installers.
Based on the specified color of the terrazzo design, each batch of terrazzo mix is poured onto the surface in designated spots. Installers use a trowel to even the surface at 3/8″ thickness. They can use an electric power trowel after hand troweling 100 square feet of the surface. The process continues until the terrazzo is enclosed within the divider strip for the specified color.

Grinding Terrazzo
When the terrazzo is poured in place, the surface will look rough. The grinding stage of the terrazzo flooring process will transition the rough surface into a smooth flat surface. Depending on the hardness of the aggregate, an installer will determine which grit diamond to attach to the grinding machine.
Beginning in the area where the terrazzo has been cured the longest, an installer will move an electric floor grinder slowly back and forth across the surface. The installer will go over the area several times, moving the machine from side to side. Edge grinders are used in areas where the electric grinder is unreachable. This includes areas such as the walls.

Grouting of Ground Floor
Before grouting, the installer will clean the floor with water and auto scrubber. The floor must be completely dry before the grouting process begins. During this process, an installer will inspect the terrazzo floor for any pinholes and voids left after the grinding process.
In cases where pinholes are visible, an installer will mix the appropriate epoxy color (5:1 ratio) in small amounts. This is applied over the pinholes using a flat straight edge trowel. Before moving on to the polishing stage, an installer must cover pinholes for any chosen color.

Polishing Terrazzo Floor
Polishing a terrazzo floor is performed wet. In this stage, an installer will go over the floor in the same ways they went over the surface in the grinding stage. This allows the floors to really shine afterward. The higher the grit, the more shine the floor will have.

Sealing the Terrazzo Floor
The final stage involves cleaning and sealing the terrazzo surface. All polishing slurry is vacuumed and the floor is cleaned with fresh water, neutral soap, and an electric scrubber. The floor is cleaned again and left to dry before a sealer is applied.
Sealers are applied to give the surface protection from foreign objects over the lifecycle of the flooring surface. Normally two coats are applied. The first coat is applied and allowed time to dry before the second coat is applied.
Once the terrazzo floor is dried, the terrazzo installation is complete.
Epoxy terrazzo can be installed over most clean and properly prepared concrete slabs. Seen today in healthcare facilities, schools, hotels, and other commercial applications.


